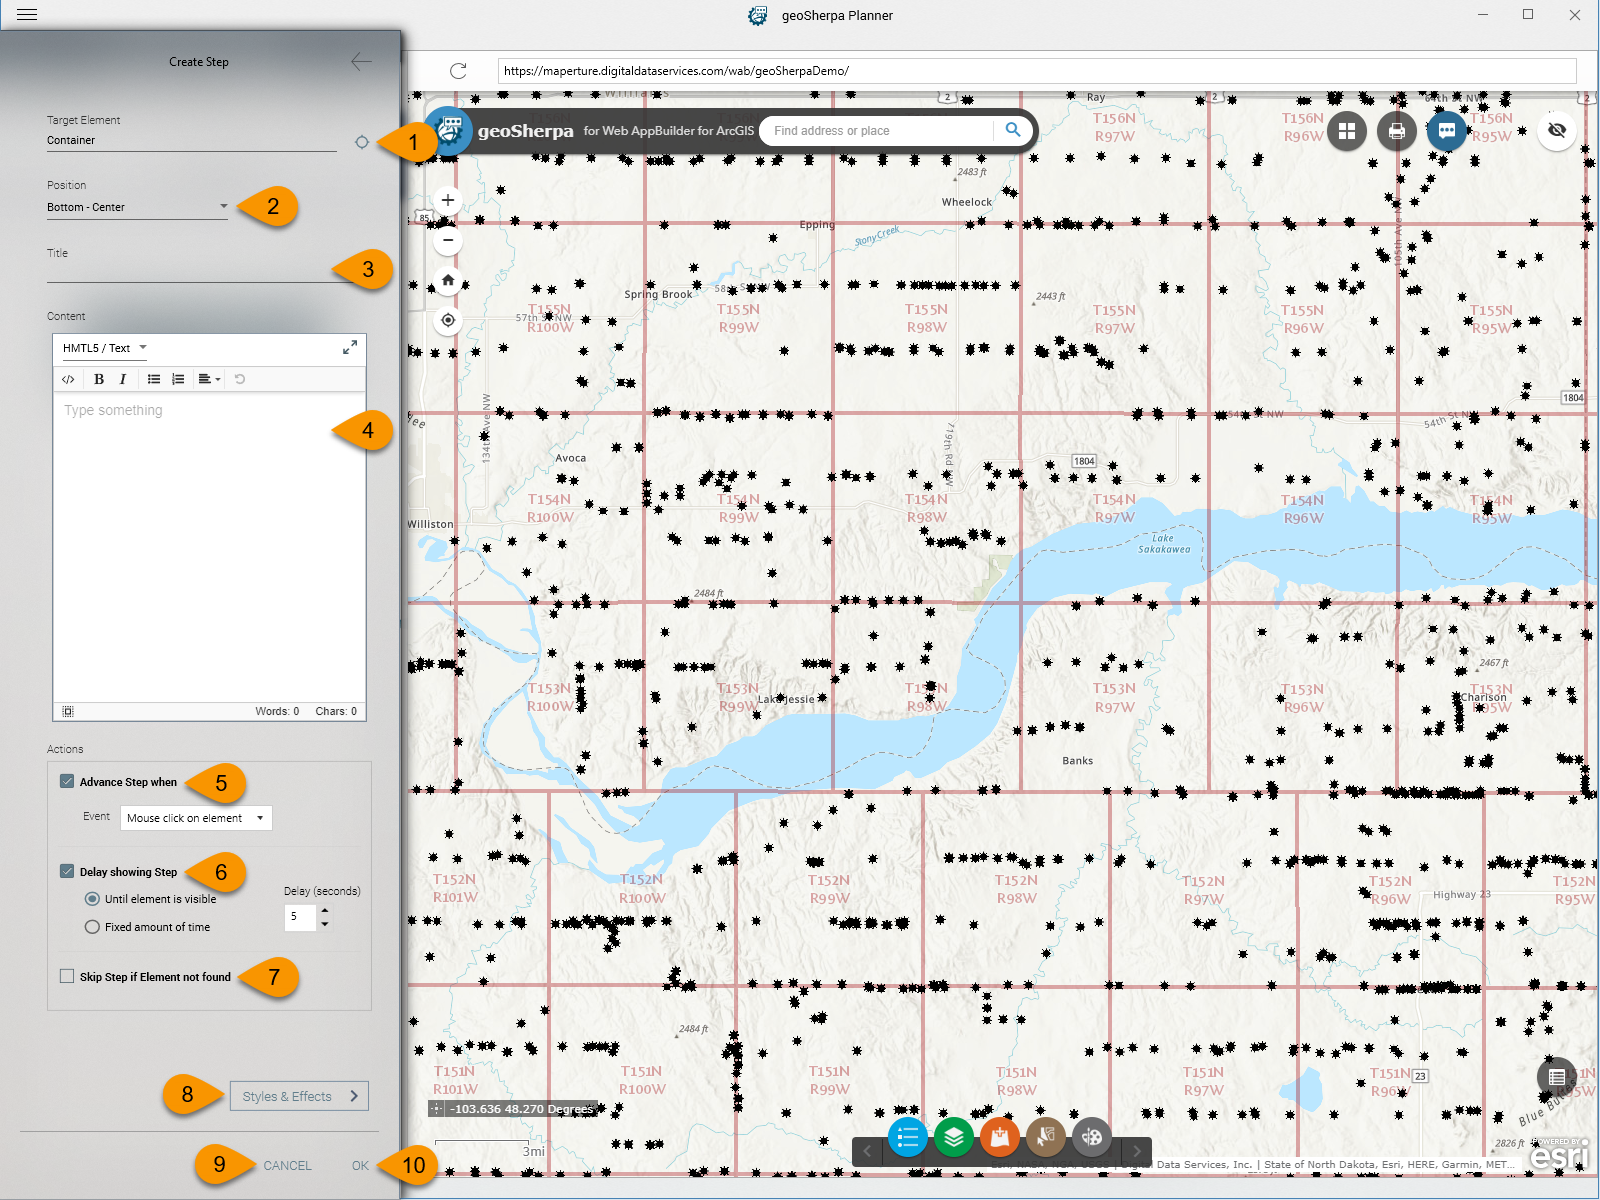
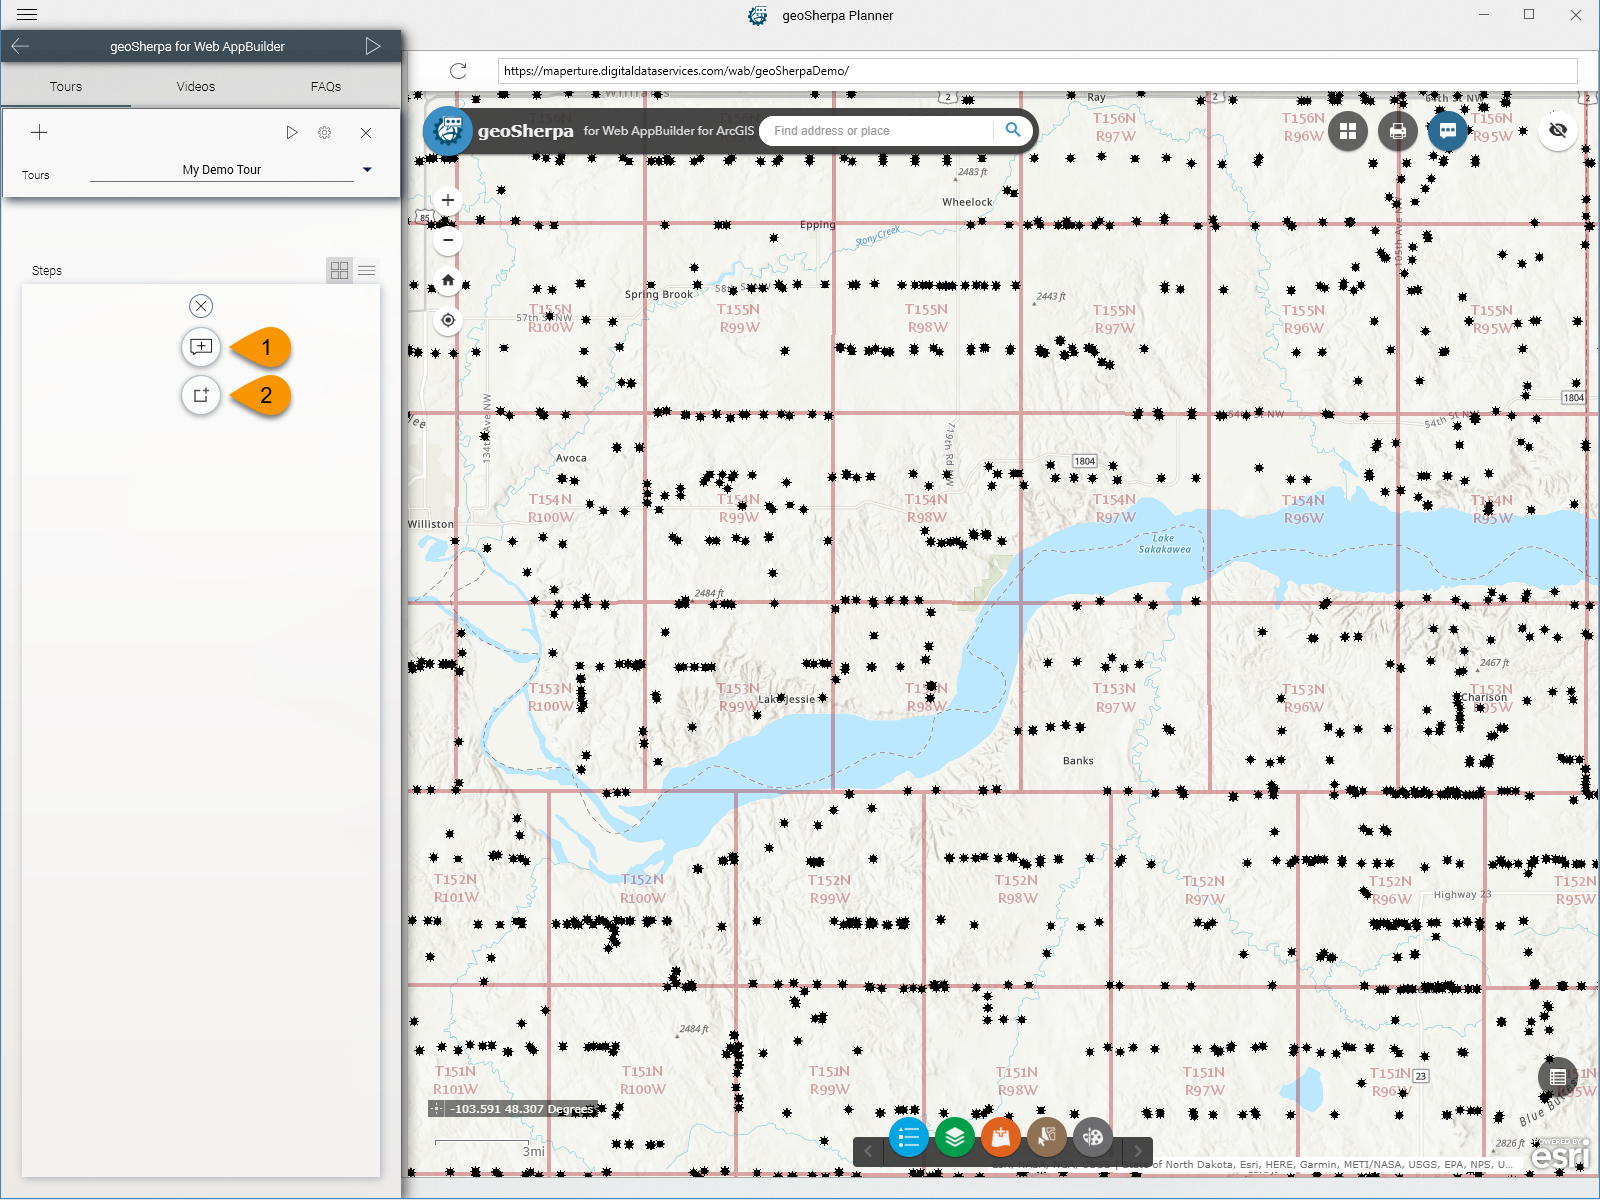
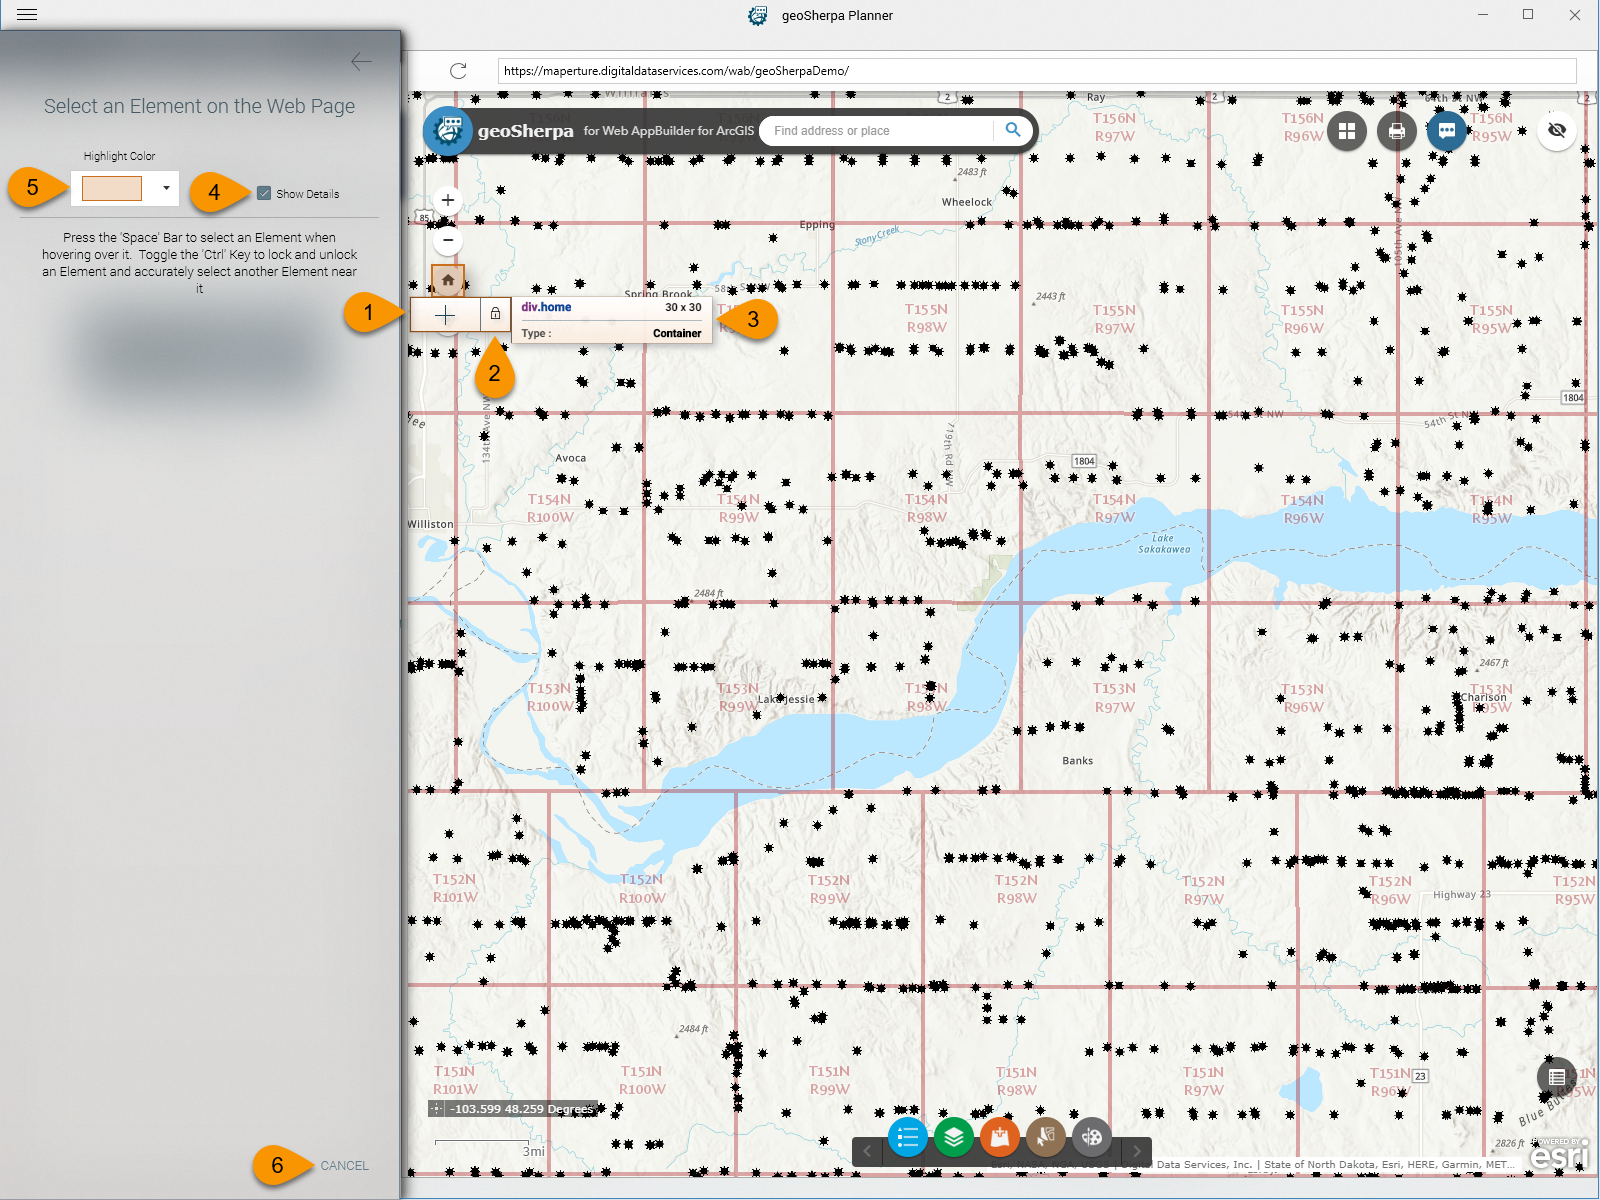
1. Home
  2. Docs
  3. geoSherpa Documentation
  4. About geoSherpa Planner
  5. geoSherpa Planner – Creating Tour Steps

geoSherpa Planner – Creating Tour Steps

Adding New Tour Steps

In geoSherpa there are two types of dialogs to interact with the user.

Create Targeted Step Icon

1. Tour Step

The Tour Step is used to bring focus to a specific element within your web application. This is used to direct the user to execute a specific action or highlight an element on the page.
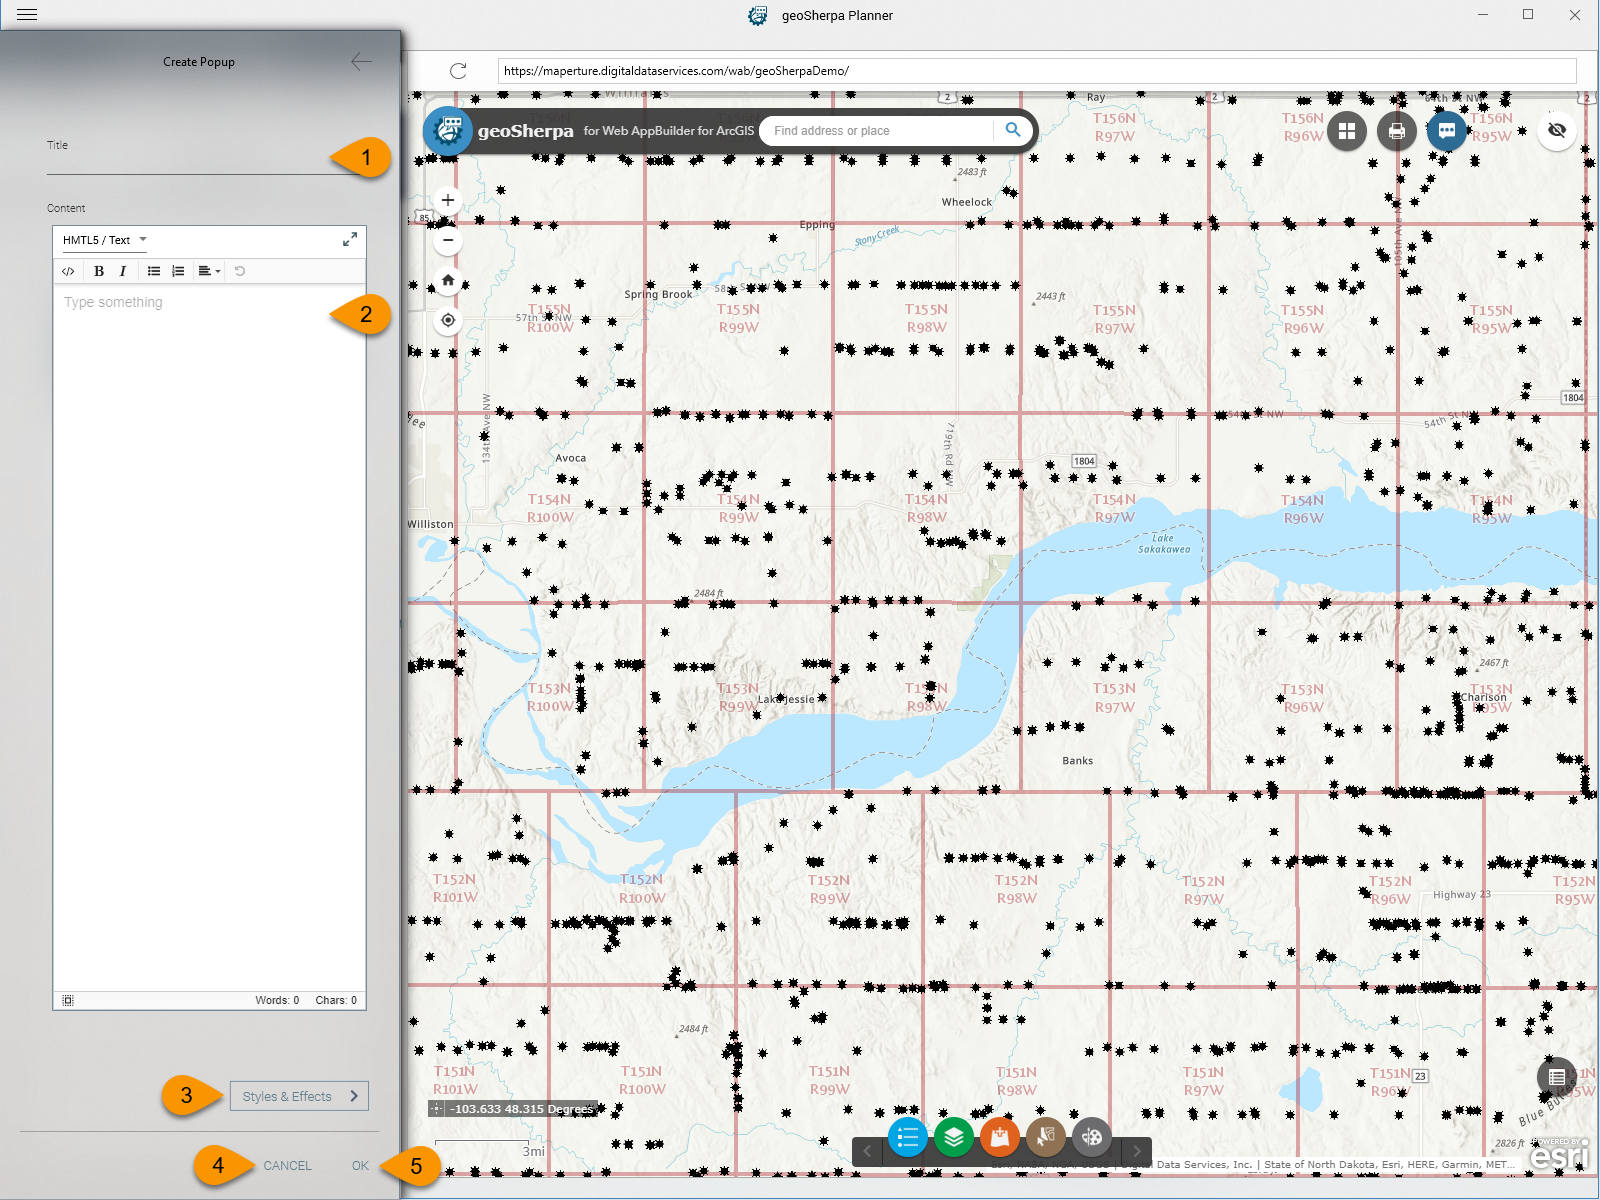
Create Centered Step Icon

2. Centered Popup

A Centered Popup creates a modal dialog centered within your web application. Centered Popups are used to present general information to your users.

Editing Tour Steps

Each Tour Step has a menu located in the lower right of the Dialog view or by clicking the pencil icon in the List View.

1. Edit Tour Step

Click the Pencil icon to edit the Tour Step.

2. Delete Tour Step

Click the X icon to delete the Tour Step.

Selecting Tour Step Target Element

When creating a Tour Step (or when re-targeting a selected element), you select an web page element using the following tool.

1. Select Highlighted Element

Click on the + icon to select the currently highlighted HTML element. Alternatively, you can use the SPACE bar to select the currently highlighted HTML element.

2. Lock Highlight Element

Click the lock icon or alternative use the CRTL key. The element lock will display a tree view of the surrounding HTML elements to assist in targeting the correct element.

3. Highlighted Element Details

Displays details about the highlighted HTML element. 

4. Show Details Option

Enables or disables the Element Details box displayed when highlight HTML elements.

5. Highlight Color Selector

Allows you to change the default element highlight color within the geoSherpa Planner.

6. Cancel Button

Cancels the current element selection process.

Configure Step

Lorem ipsum dolor sit amet, consectetur adipiscing elit. Ut elit tellus, luctus nec ullamcorper mattis, pulvinar dapibus leo.

1. Target Element

Displays the type of currently selected element. Clicking the target icon will allow you to reselect the element or chose another.

2. Position

Select the position around the targeted element that the Step will display on.

3. Title

Enter or change the title of the Step.

4. Content Editor

Enter the content to be displayed in either plain text, HTML or Markdown.

5. Advance Step when

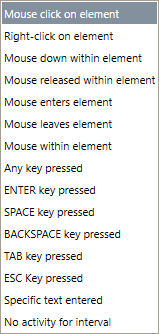
If unchecked, the Step must be advanced by the user clicking the Next button on tip. If checked, geoSherpa will monitor for the event selected.

6. Delay showing Step

Some page elements may take time to render (e.g. executing a query, opening a panel, etc.). Use the Delay showing Step to set geoSherpa to wait for page elements to render. The default is 5 seconds. 

7. Skip Step if Element not found

This controls what happens if the target element is not found. If left unchecked, when the element is not found, geoSherpa will display an “Element Not Found” warning. If checked, the Tour will continue skip this Step and continue to the next.

Use the Skip Step if the Element state is unknown. For example, in Geocortex the Toolbar button hides when the Toolbar is open. You would target the Toolbar icon first, set the Delay to ~1 second and check "Skip Step".

8. Styles & Effects

Opens the Style & Effects options.

9. Cancel

Cancels any changes.

10. OK

Saves any changes.

Configuring Popup

1. Title

Title of the popup.

2. Content Editor

Enter the content to be displayed in either plain text, HTML or Markdown.

3. Style & Effects

Opens the Style & Effects options.

4. Cancel

Cancels any changes.

5. OK

Saves any changes.

Tour Step View Options

geoSherpa Planner provides two options to view your Tour Steps. The Dialog View is the default view. 

Dialog View

The Dialog View is the default view. From this view you can add new Tour Steps, edit or delete an existing Tour Step, and reorder Tour Steps.

List View

The List View is a more compact way of viewing your Tour Steps. From this view you can add new Tour Steps, edit or delete an existing Tour Step, and reorder Tour Steps.

Changing Tour Step Order

You can change the order of your Tour Steps by dragging and dropping Steps in both the List and Dialog views.