When you start geoSherpa Planner, you will be brought to the Guide Manager. The Guide Manager, is will list all your currently configured Guides.
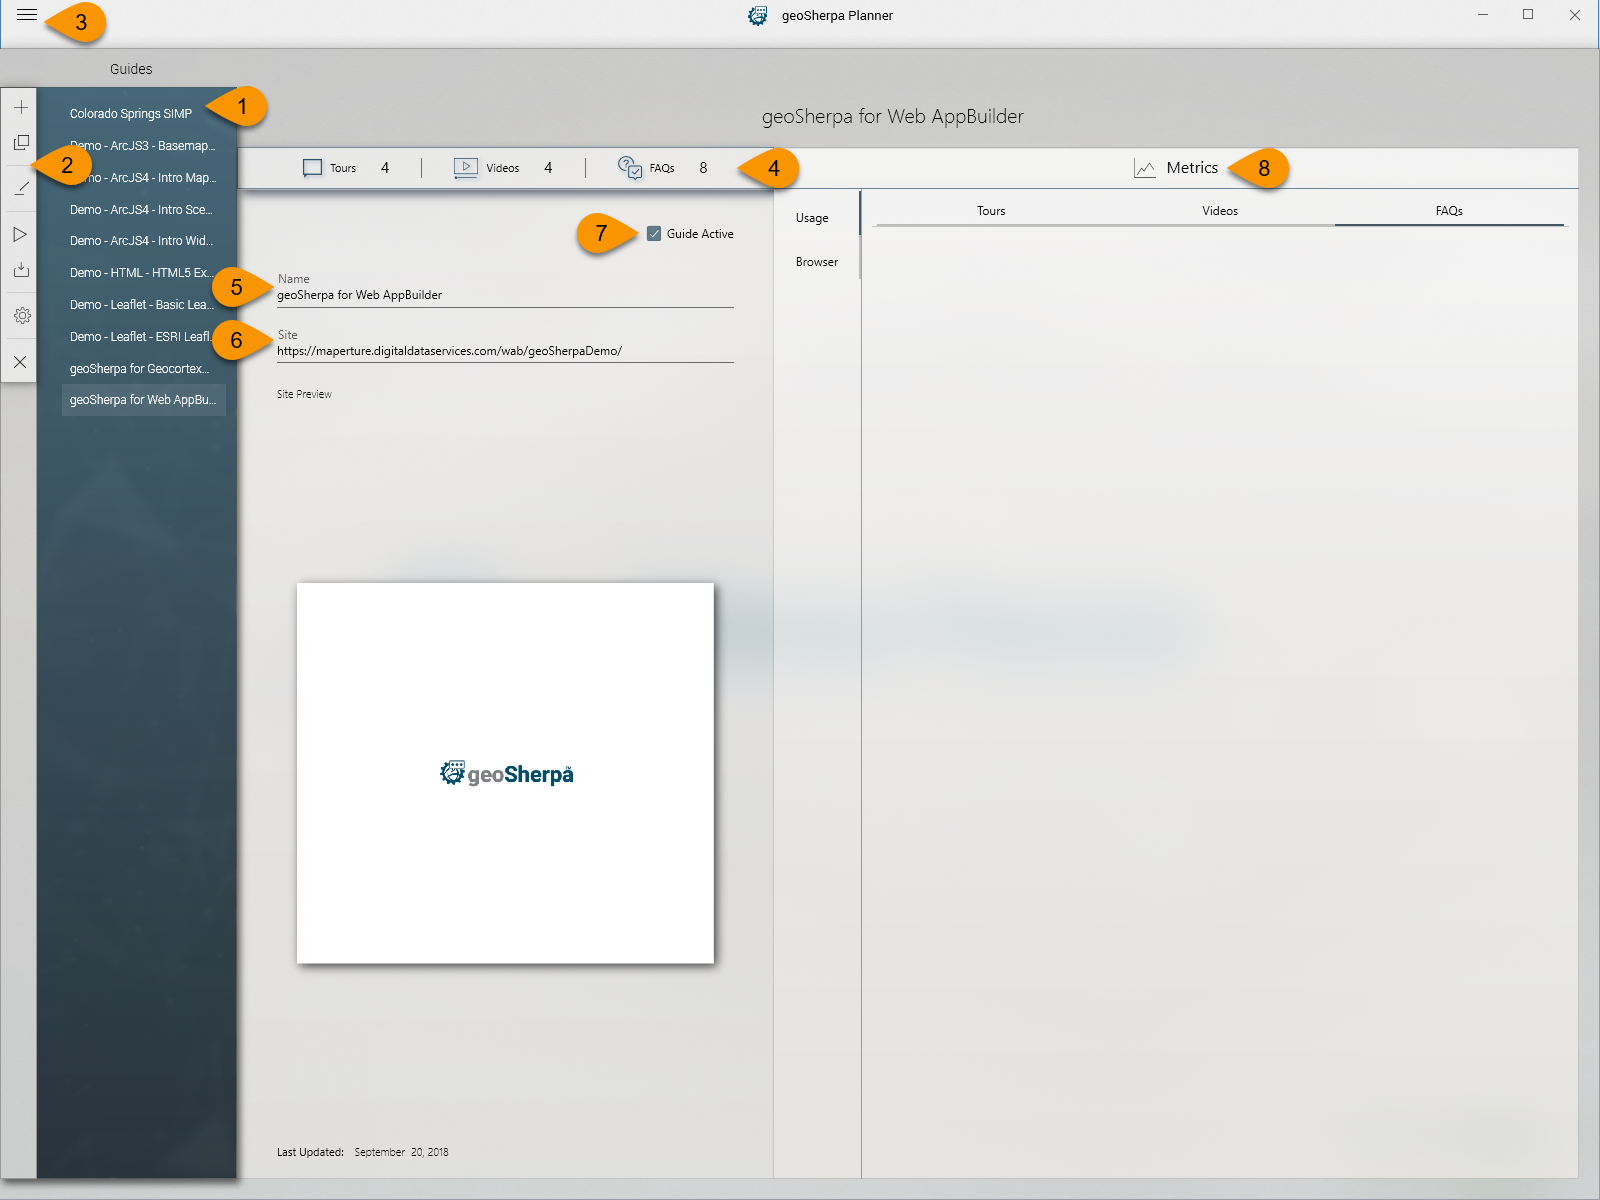
1. Guide Listing
The Guide Listing will list all Guides associated with your organization. If you are just start, this list will be empty.
- Single Clicking on a Guide activates the selected guide allowing you to use the Guide Menu and see information about the Guide.
- Double Clicking on a Guide loads the Guide into editing mode within geoSherpa Planner.
2. Guide Menu
Hovering over this fly-out menu will open the Guide Menu where you can create, edit, preview, configure, and clone guides. For more information, visit the Guide Menu documentation page.
3. Application Settings
This icon opens the geoSherpa Planner Application Settings. For more information, visit the Application Settings documentation page.
4. Guide Statistics
Displays an overview of the number of Tours, Videos, and FAQs within the currently selected Guide.
5. Guide Name
Displays the name of the geoSherpa Guide.
6. Guide Site URL
Displays the URL to the web GIS application.
7. Guide Active Checkbox
This checkbox allows the creation of Guides within an active site. If the Guide is checked Active, it will be displayed on your site. If the Guide is not checked Active, it will not be displayed on your site.
8. Guide Metrics
[Coming Feature] This section will display basic usage statistics and error reports on how geoSherpa guides are being used within your Web GIS application. The metrics will initially be GDPR-compliant and not track any identifying information. This information will be used to identify which Guide Items are being used and provide error information to assist in improving the quality and accuracy of your Tours.