This documentation explains the geoSherpa Guide Menu and its associated functionality.
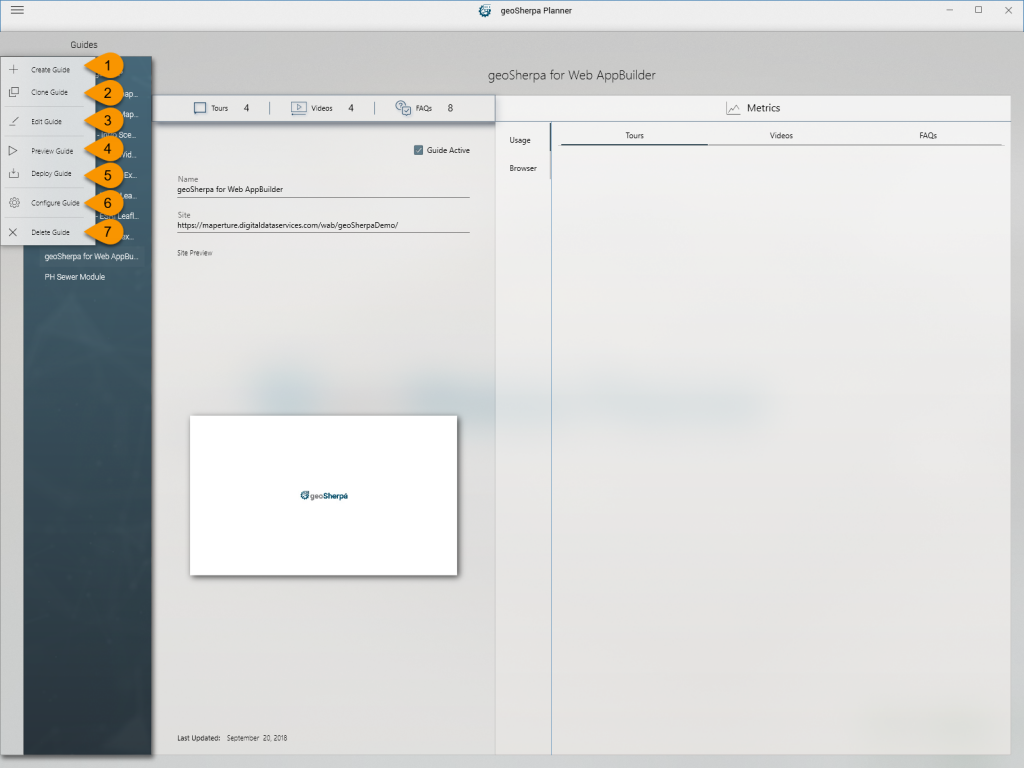
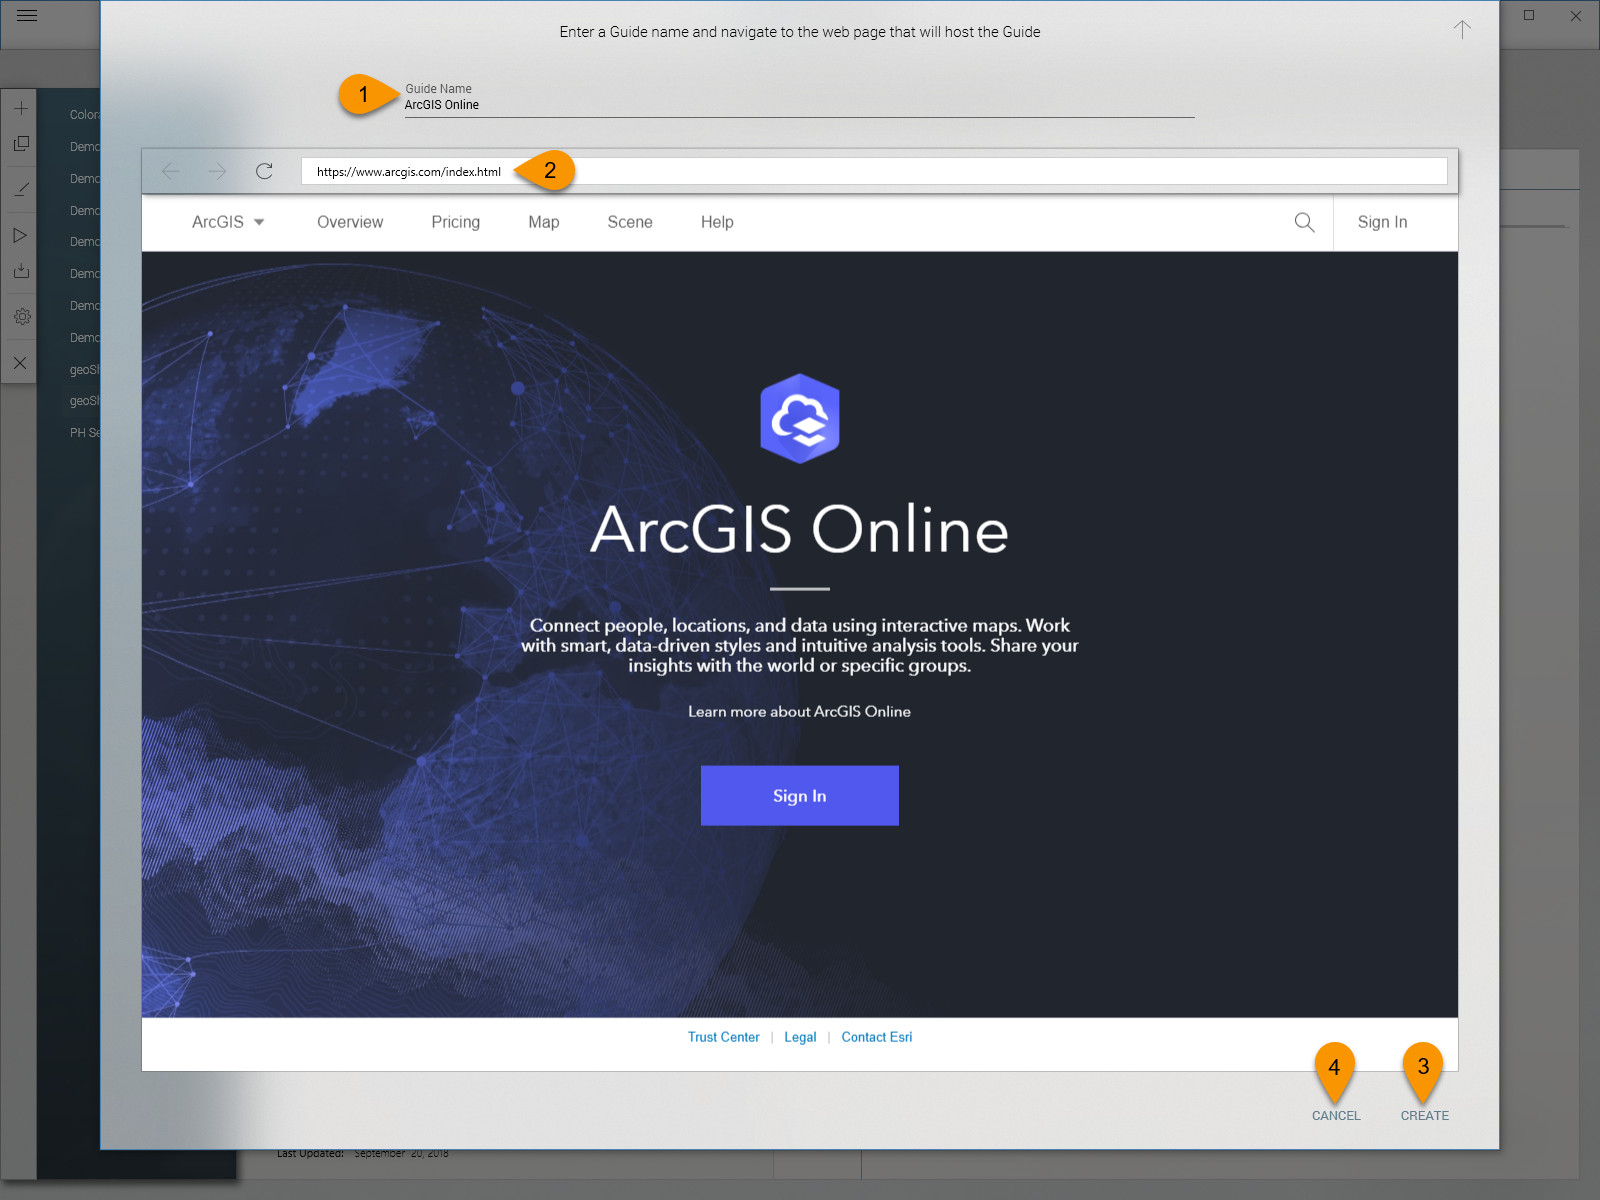
1. Create Guide
Create Guide Dialog
1. Guide Name
Enter the Guide name you wish to use.
2. Site URL
Enter the URL of the site you wish to create a geoSherpa Guide for. A preview will be shown.
3. Create Button
Click the Create button to create the geoSherpa Guide.
4. Cancel Button
If you do not want to create a site, click Cancel.
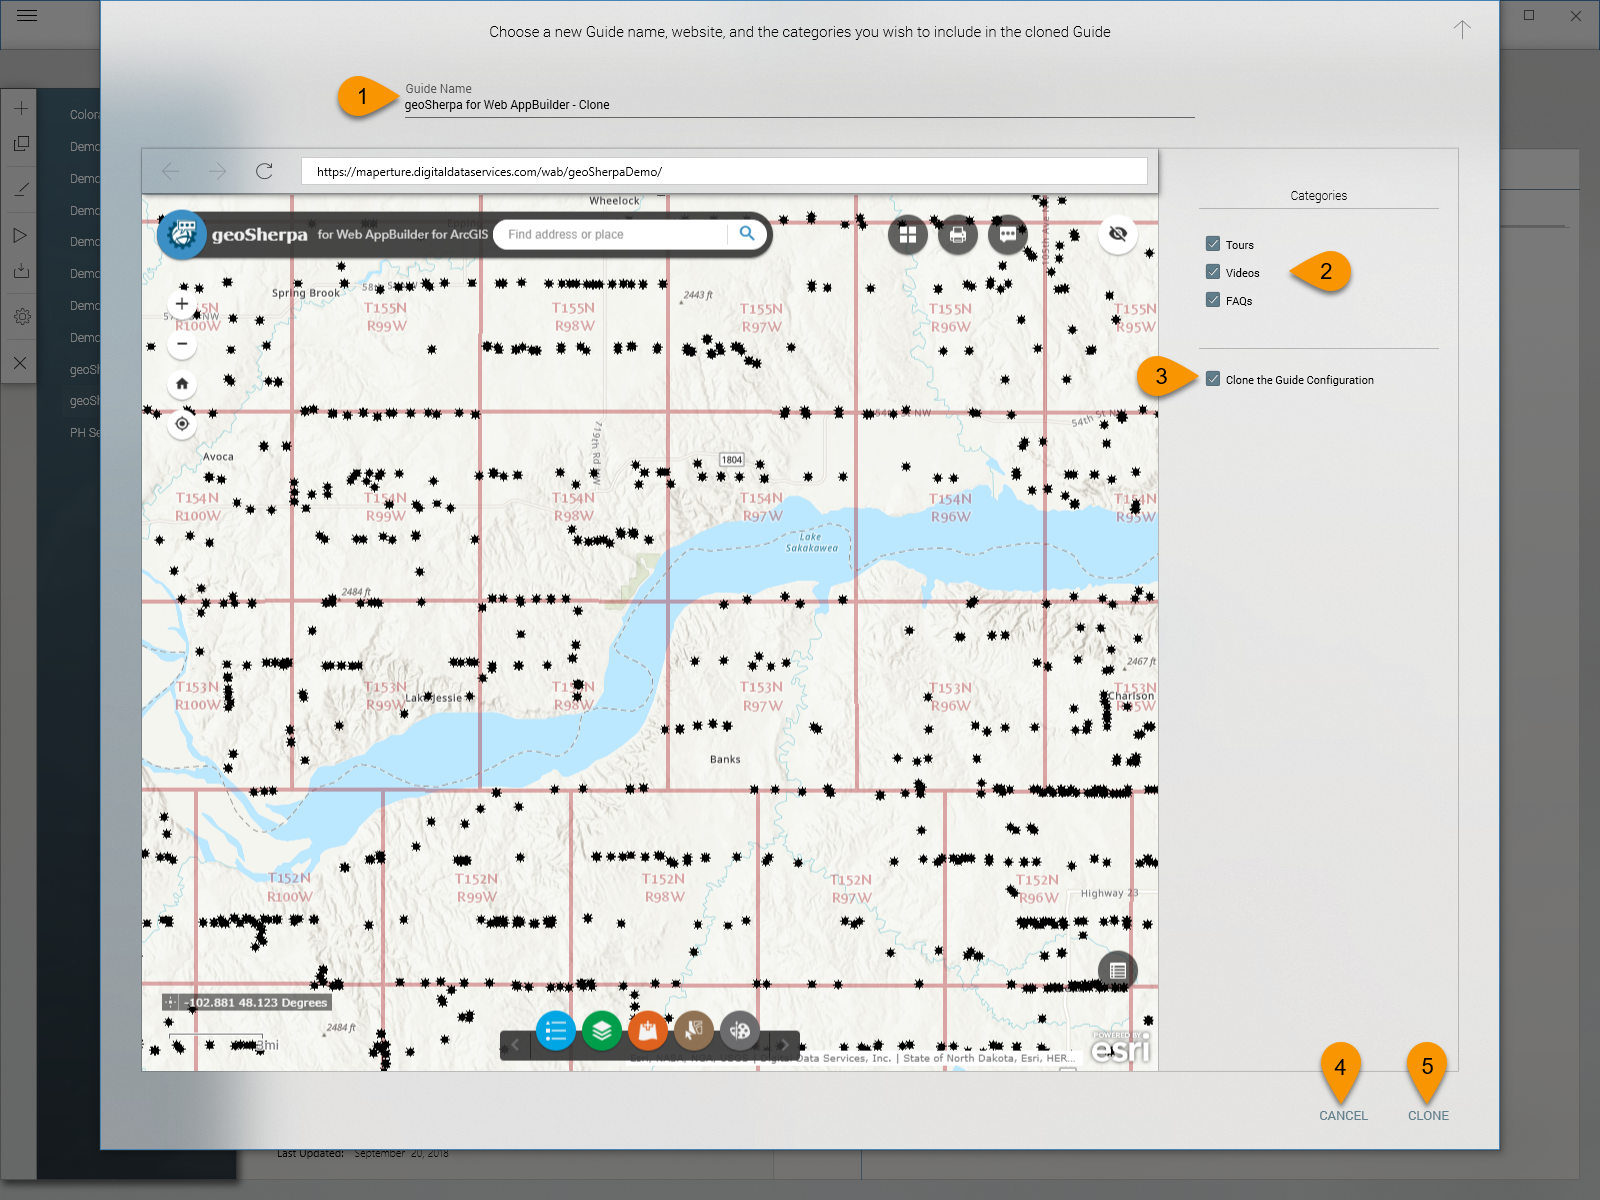
2. Clone Guide
Use Clone Guide to create a clone or copy of an existing geoSherpa Guide.
Clone Guide Dialog
1. Guide Name
Enter the Guide name you wish to use. The default name will be the name of the original Guide with ” – clone” appended.
2. Categories
Choose which categories of Guide Items (Tours, Videos, FAQs) you wish to copy. Checked categories will be copied to the new Guide.
3. Clone Guide Configuration
If checked, the Guide Configuration Settings will be copied to your new Guide. If unchecked, the Guide Configuration Settings will be returned to default.
4. Cancel Button
If you do not want to clone a geoSherpa Guide, click Cancel.
5. Clone Button
Click the Clone button to create a copy of the geoSherpa Guide.
3. Edit Guide
The Edit Guide button will open the Guide to the Tour Editing screen. This can also be done by double-clicking on the name of the geoSherpa Guide from the Guide Overview window.
For more information, on creating Tours, Videos, and FAQs visit the associated documentation.
4. Preview Guide
Preview Guide will open the geoSherpa Guide to allow you to test the functionality of the Guide before deploying to your users.
NOTE:
- This preview utilizes a built-in Webkit browser similar to Chrome and Firefox. It is recommended that testing be done in all expected web browsers.
- geoSherpa is tested in all modern browsers. geoSherpa is not supported below Internet Explorer 11.

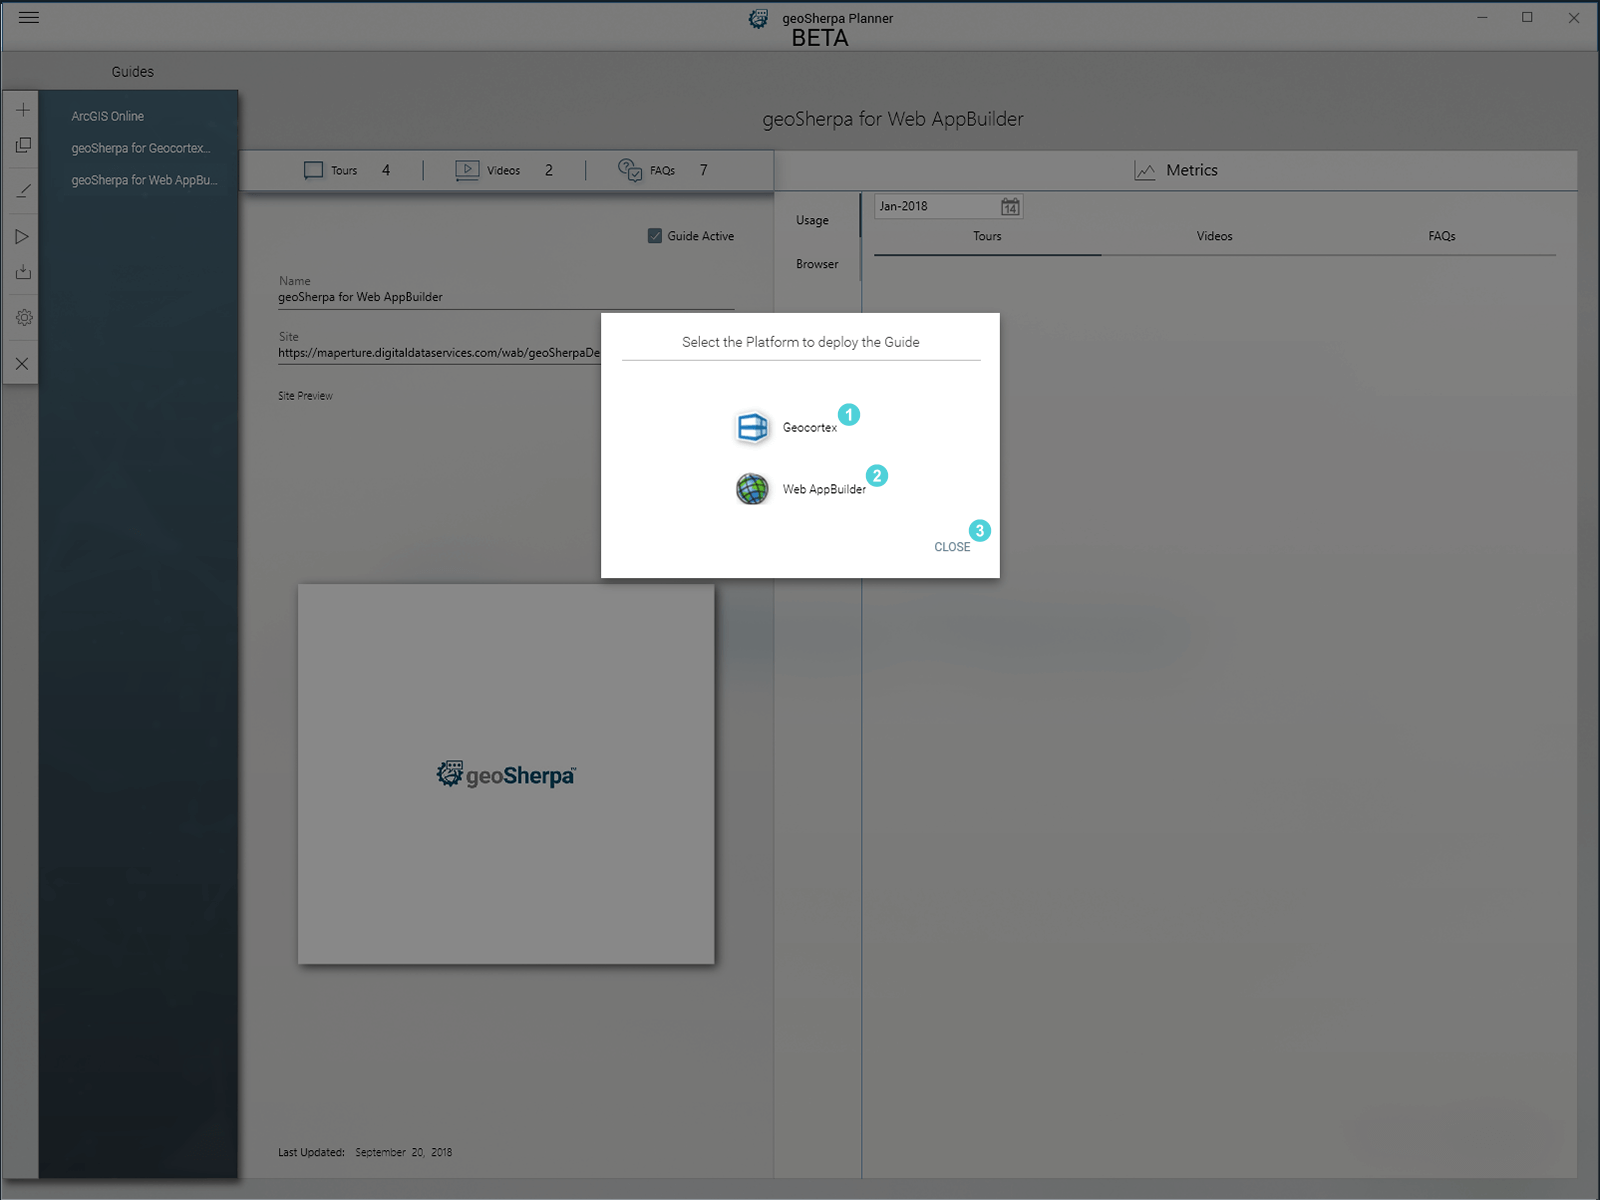
5. Deploy Guide
Deploy Guide opens a dialog to assist in deploying to web GIS applications. geoSherpa currently supports both Web AppBuilder for ArcGIS and Geocortex Viewer for HTML5.
For more information, on deploying to these web GIS applications, visit the appropriate documentation.
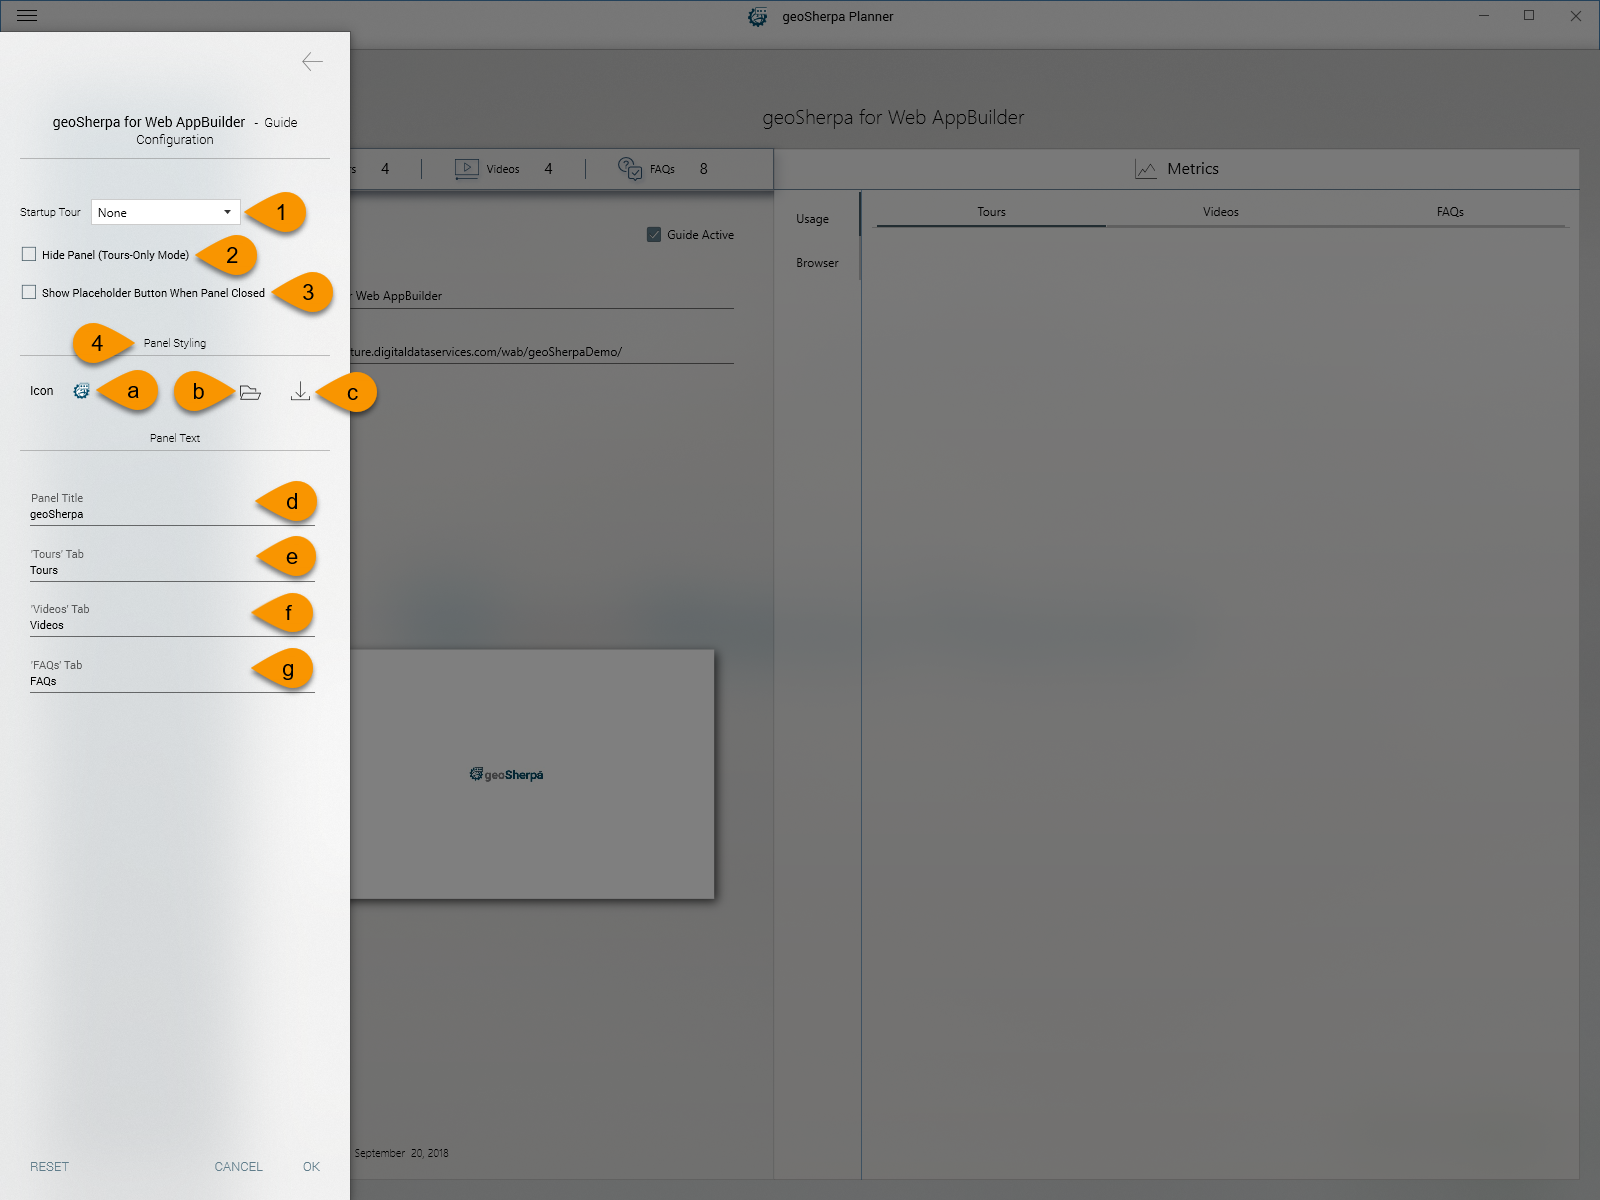
6. Guide Configuration Settings
1. Startup Tour
This drop-down allows you to select a Tour that will automatically start each time the geoSherpa Widget is loaded. The default is None.
2. Hide Panel (Tours-Only Mode)
This option is used typically only with a single tour that is set as a Startup Tour to introduce users to the sites functionality.
3. Show Placeholder Button When Panel Closed
This option will display a floating button that will toggle the geoSherpa Panel open and closed. It is primarily intended for HTML5 Web GIS applications.
4. Panel Styling
The Panel Styling section allows you to change the default icon and text displayed on the geoSherpa Panel.
Support for i18n will be available by the end of 2019.
a. Icon Preview
A preview of the icon that will be displayed in the Guide Panel. This defaults to the geoSherpa logo. It can be changed using the following to methods.
b. Icon Upload from Local File
Pick an image from your local file system that you would like to use for the Guide Panel Icon. The image should be in .PNG or JPEG format. The final image will be rendered at 16×16 pixels.
c. Icon Upload from URL
Enter the web adress of an image that your like to use for the Guide Panel Icon. The image should be in .PNG or JPEG format. The final image will be rendered at 16×16 pixels.
d. Panel Title
Use this field to change the geoSherpa Panel title.
e. Tours Tab Title
Use this field to change the Tours tab title.
f. Videos Tab Title
Use this field to change the Videos tab title.
g. FAQs Tab Title
Use this field to change the FAQs tab title.
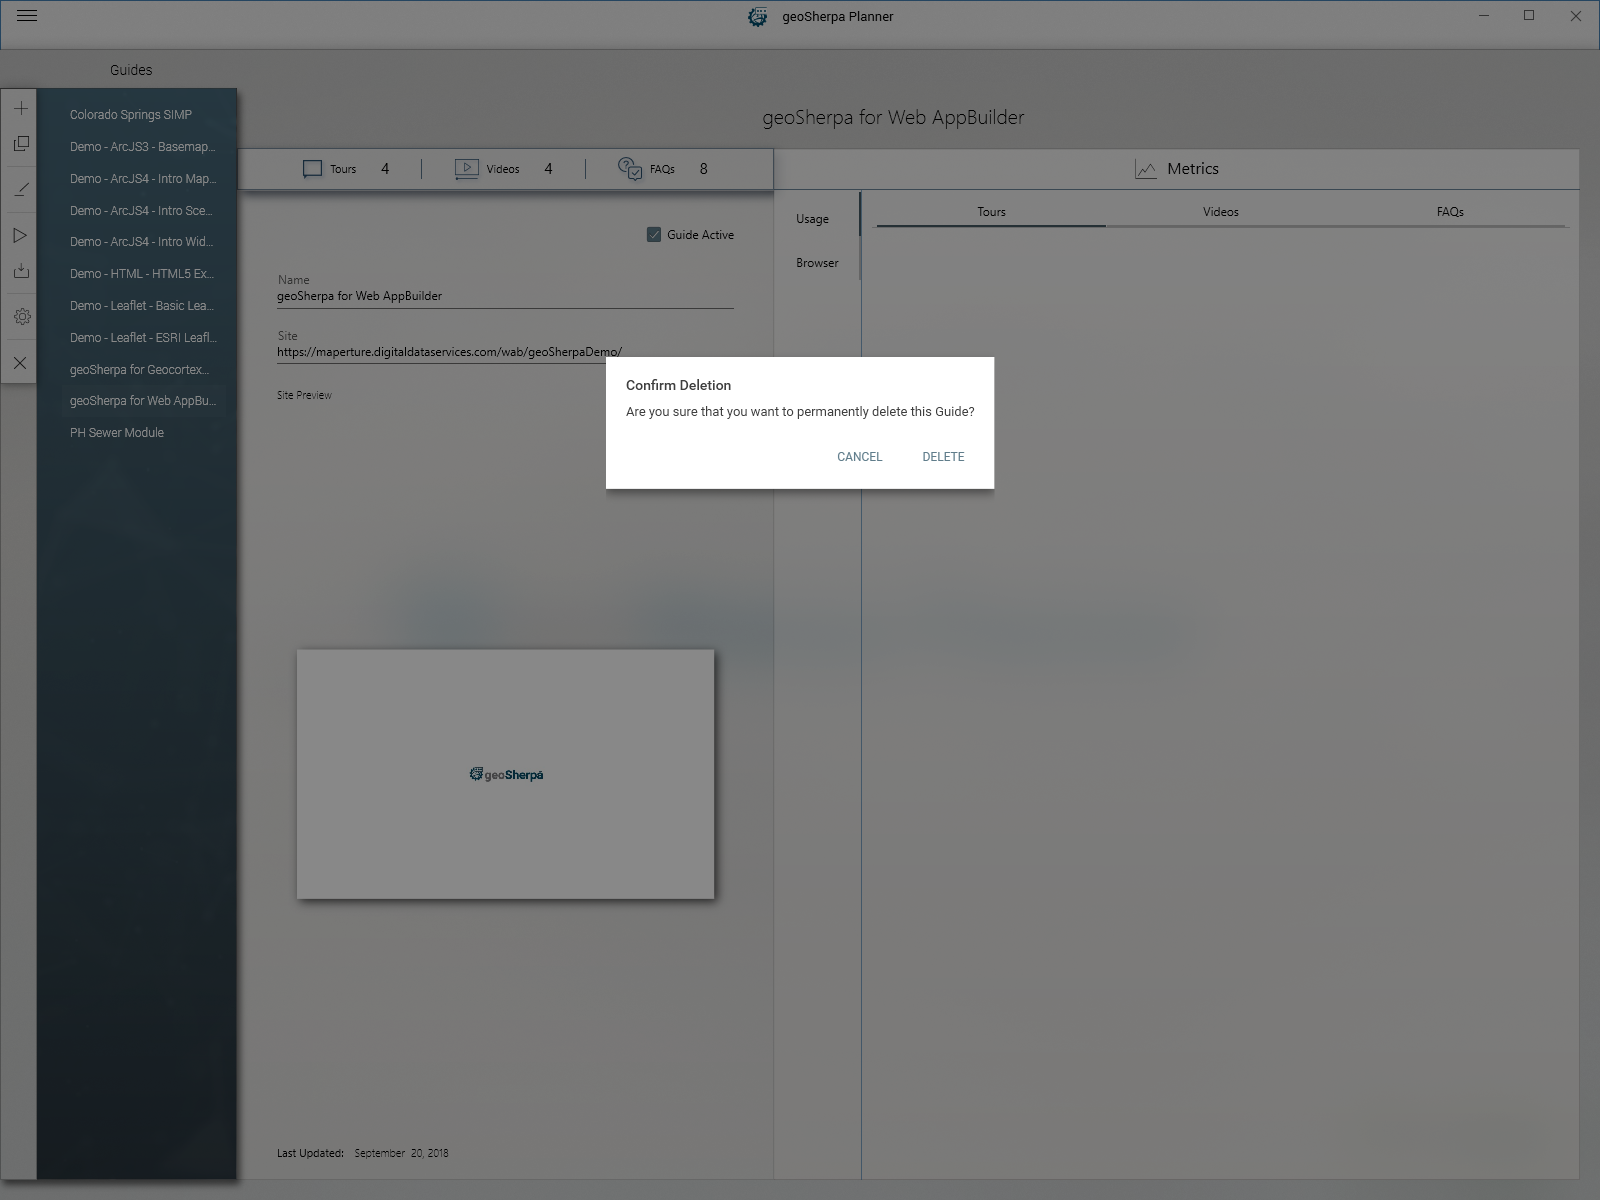
7. Delete Guide
The Delete Guide will open a confirmation dialog before deleting the selected Guide.
WARNING: The Guide deletion process is permanent.